


How to Solve Wall Thinning in Thermoformed Plastic Sheets
 Oct 29, 2026|
 View:2
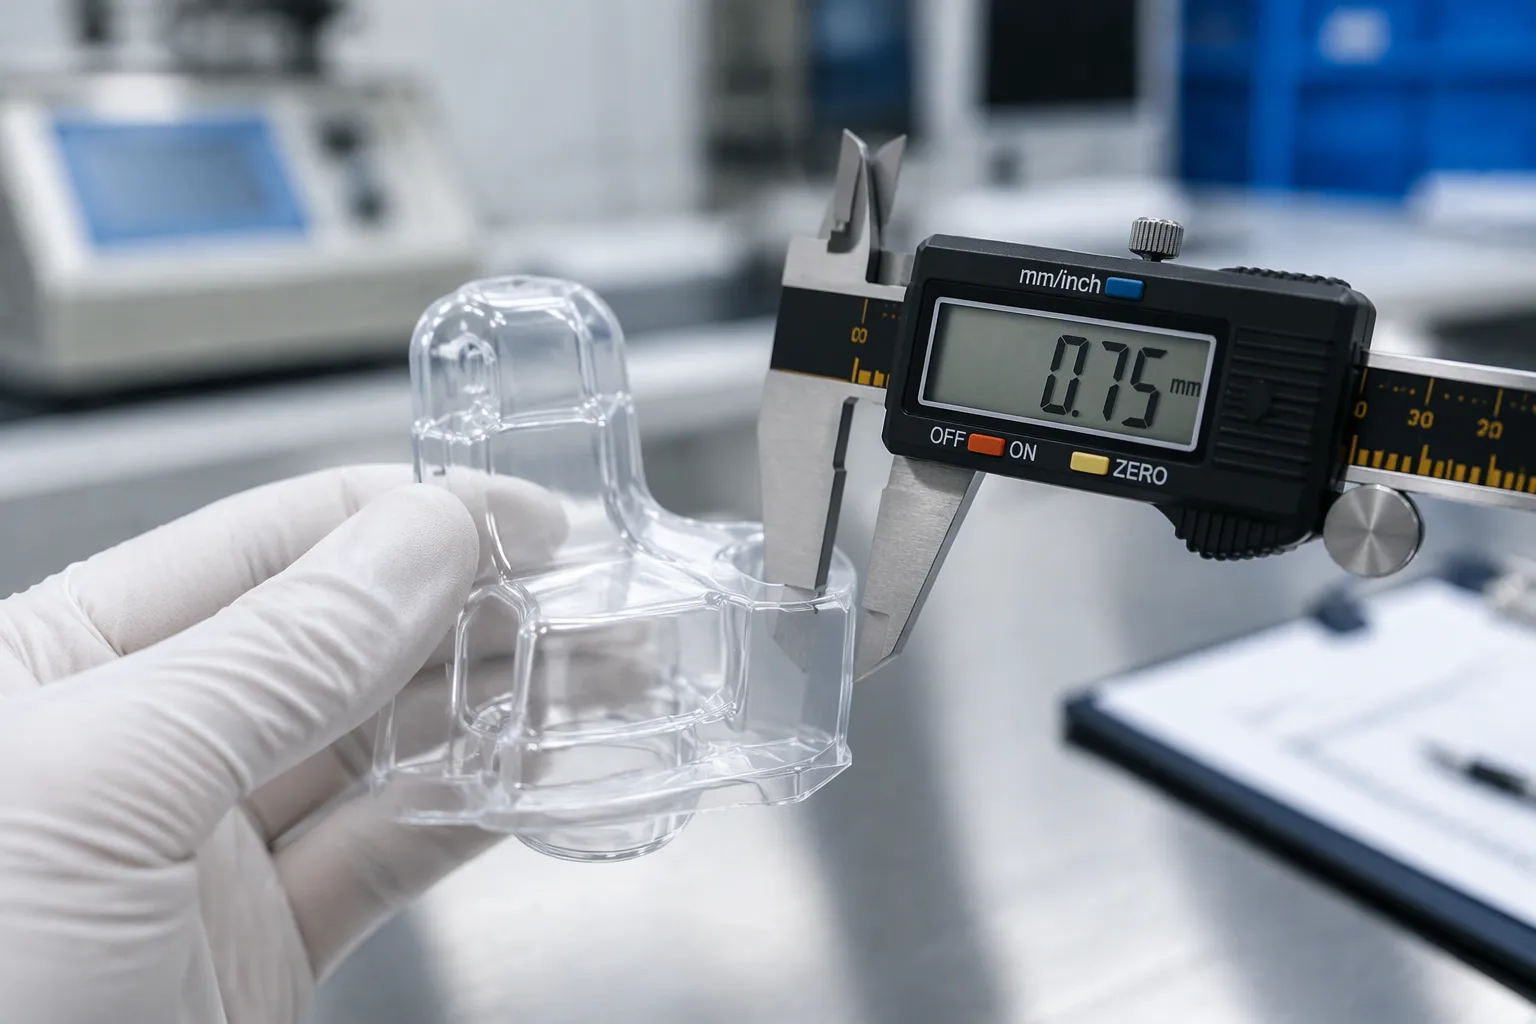
Wall thinning in thermoformed plastic sheets comes from material spreading unevenly as it stretches. You fix it by tuning the heating, tooling, and forming settings.
A plastic sheet with a high melt flow rate handles local stretching better. The material flows more evenly across the mold, so walls stay closer to your target thickness. This is where the right thermoforming grade really matters.
This guide explains what causes uneven walls. You will learn how to fix & prevent it with a practical tooling, material, and process fix for each stage. Thickness measurement also gets full attention, because it closes the loop on quality control.
Key Takeaways
Make your oven's heat even and block drafts so the plastic doesn't stretch unevenly.
Add plug assist and round sharp corners to push material into walls and reduce thinning.
Adjust the pre-blow height and vacuum timing so the sheet stretches evenly before forming.
Pick a plastic grade with a high melt flow. Then figure out the right starting gauge so the walls stay even.
Check the wall thickness on sample parts often. This helps you find problems early and keep quality high.
Causes of Wall Thinning in Thermoformed Plastic Sheets
Draw Ratio and Uneven Stretching
Draw ratio is the easiest way to predict wall thinning. It compares the final part surface area to the original sheet area you started with. Ditai Plastic explains the areal draw ratio as final part surface area divided by original sheet area. A sheet area of 360,000 mm² that becomes a part with 720,000 mm² of surface has a draw ratio of 2.0. Average wall thickness then drops to the starting gauge divided by that ratio, so a 4 mm sheet averages about 2 mm.
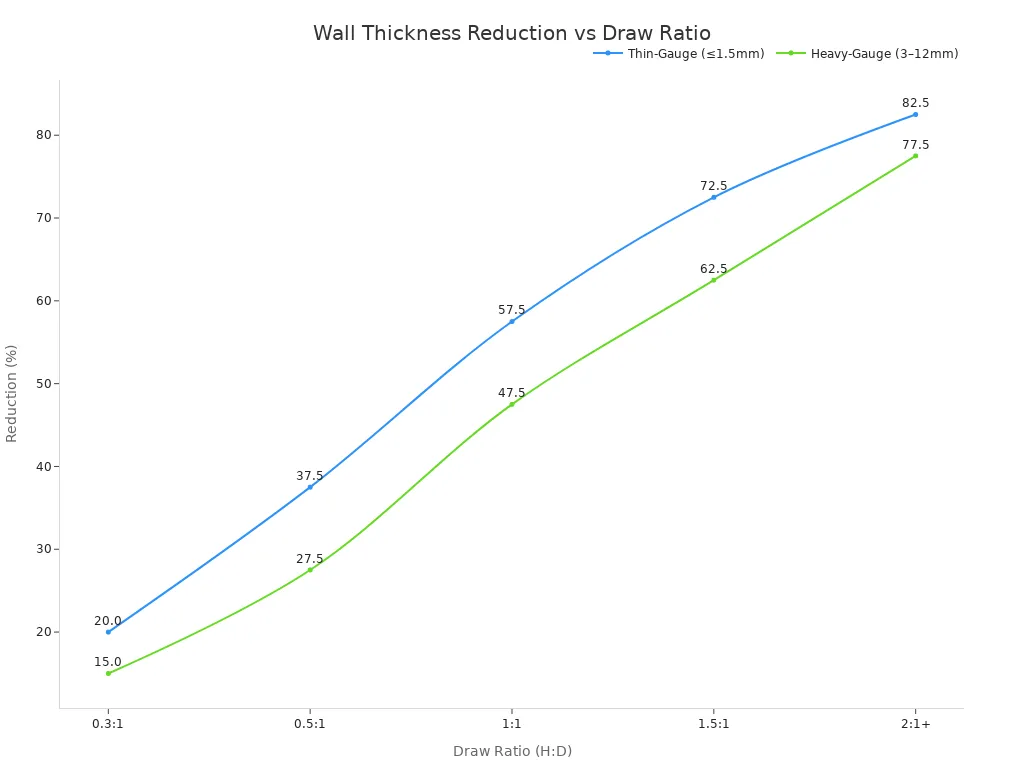
Depth-to-width ratio works as a quick field estimate. Divide the deepest feature by its smallest opening. Ditai Plastic reports that a 1:1 ratio cuts thin-gauge thickness by 50–65%, while a 2:1 ratio or higher removes 75–90%. The chart below, published by Ditai Plastic, shows how reduction climbs with draw ratio for thin-gauge and heavy-gauge sheets.
Heat, Corners, and Plug Assist Gaps
Four main causes lead to most cases of wall thinning in thermoformed plastic sheets. Indu Thermoformers lists a deep draw ratio with no pre-stretch, no plug assist to push material into the walls, uneven sheet heating that leaves hot spots thinning first, and sharp corners that concentrate stretching.
KCM Machine links each cause to its effect. Improper heat zoning makes the plastic stretch in an uneven way. A missing plug assist lets material thin out fast in deep cavities. Poor draft angles trap material during the pull. Non-uniform heating also creates uneven wall thickness and webbing and thinning across the part. Watch your sheet temperature closely, because hot spots stretch first and cause thickness variation you cannot fix later. A plastic sheet with a high melt flow rate resists this local stretching better, and that is where grade selection starts to matter.
Fix Heating and Tooling for Wall Thickness Uniformity
Zoned Heating and Sag Control
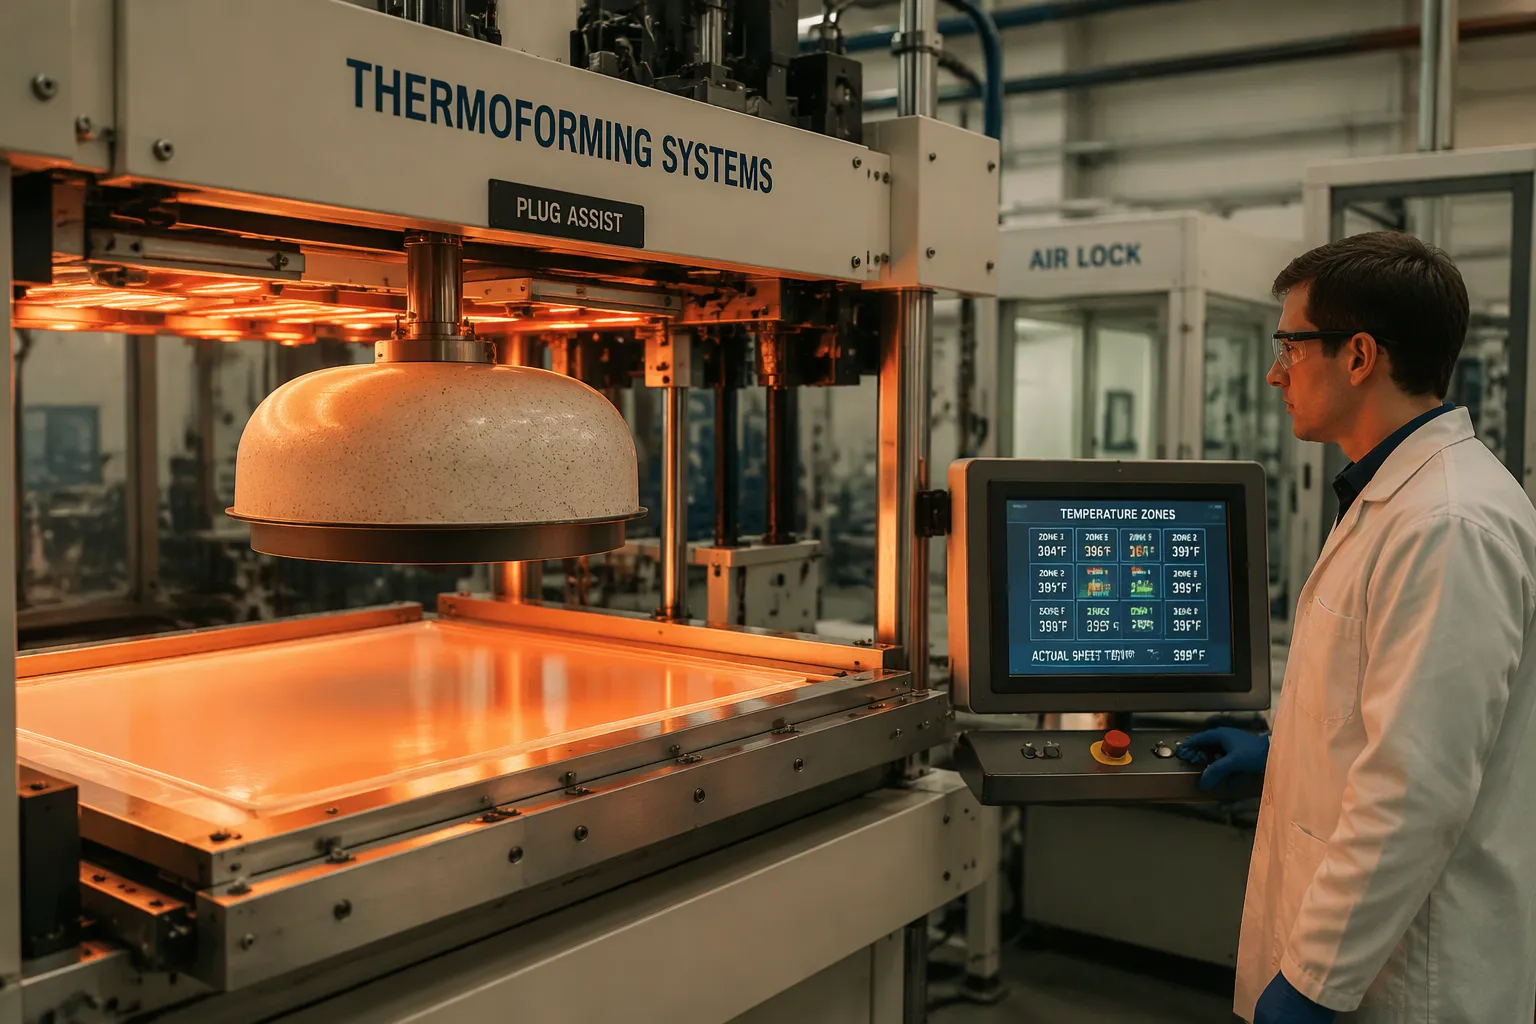
Start with the oven. A heating profile that is the same everywhere only works for shallow parts with even draw. Deep cavities need profiled heating. Wanplas recommends running heater zones over deep cavities 5 to 15 degrees Celsius hotter and flange zones cooler, so stretch resistance matches draw demand. Zone-profiled ovens with 40 or more independently controlled emitters usually reach a target thickness map within 3 to 5 measured tries.
Sag control protects that profile. Eureka Patsnap notes that outer zones usually run a little hotter than central regions to offset edge cooling. Clamps with adjustable tension hold the sheet flat around the edge. Sag sensors can start forming the moment the sheet softens past its limit. Onebmg lists long or hot oven settings and unbalanced heater zones as the main causes of sag and web handling issues.
Drafts ruin heating uniformity. Thermoforming Expert warns that open warehouse doors, air conditioning above the machine, and even motor fans cool hot plastic unevenly. Air locks at entryways solve this. Measure sheet temperature from extrusion through the forming station, and log the readings.
Plug Assist and Corner Radii
A plug pushes material into walls and base before vacuum starts. Gobelovac explains the sequence: the plug goes down, the sheet wraps around its face, and vacuum applies within 0.5 to 2.0 seconds of the plug reaching depth. The plug stops at 60 to 75% of mold depth, with plan dimensions 10 to 20mm smaller than the cavity on each side. Round plug corners at 10mm minimum. Syntactic foam is the common plug material because its rough surface pushes the sheet instead of letting it slide.
The payoff is large. Wanplas reports that deep-draw parts formed without plug assist show corner thinning of 50 to 70% versus average wall. A well-tuned plug cuts that variation to 15 to 25%. Servo-driven plug motion also improves shot-to-shot repeatability by 30% or more over pneumatic plugs. Nanshuo notes that over 90% of thin-gauge thermoforming now uses some plug assistance.
Corners need generous radii. BRT USA sets a minimum fillet of 0.125" on heavy gauge, scaled down for thin gauge. Yoochen recommends a fillet equal to the full sheet thickness for stable production. Add vacuum holes at 0.5mm diameter, spaced 10 to 15mm apart in deep corners, per Yoochen. This pulls material into corners and fights webbing and thinning.
Xinhejiu's ASA/ABS sheet thermoforms and vacuum forms at recommended melt temperatures of 220–260°C, which suits outdoor and weather-exposed formed parts. Its high melt flow lets the plastic sheet flow into corners instead of stalling, so you keep walls uniform with less thickness variation.
Tune Forming Parameters and Material for Wall Thickness Distribution
Vacuum Timing and Pre-Blow
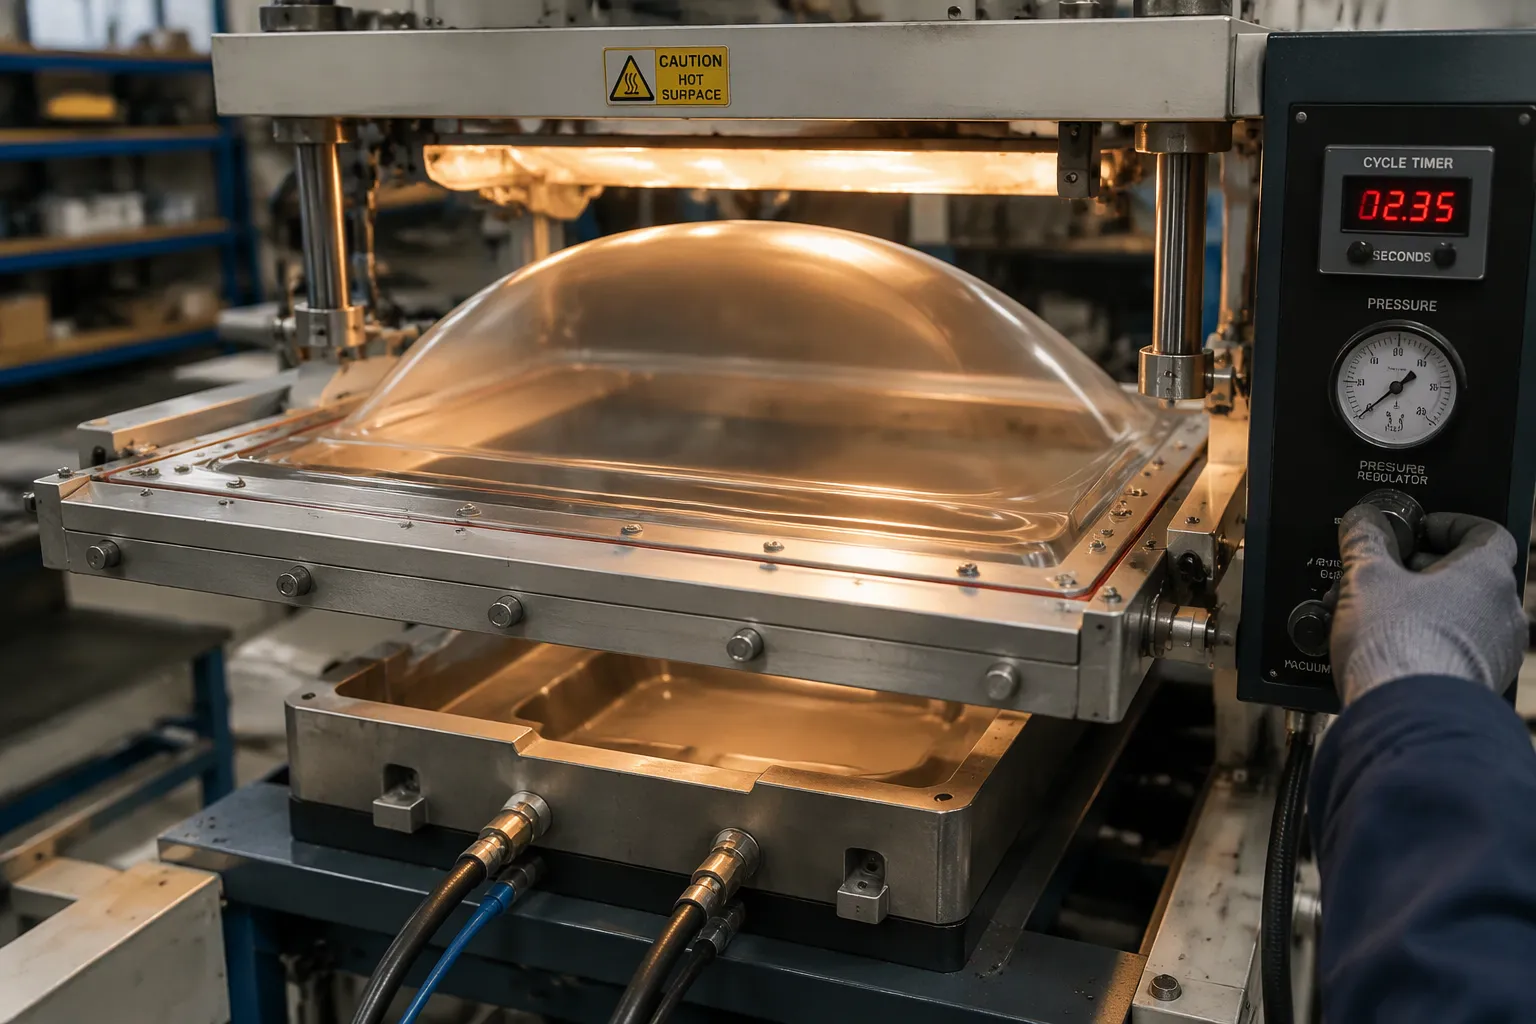
Timing decides where the material goes. If you apply vacuum too early, the sheet snaps against the mold before it stretches. If you apply it too late, the sheet cools and then thins sharply at the last corners to fill.
Pre-blow, also called billow, fixes this. You seal the sheet over the box and blow it upward into a bubble before the mold closes. The bubble pre-stretches the sheet evenly in all directions, so the material arrives at the cavity with reserve thickness instead of a single hot spot. Gobelovac describes the same logic for plug-assisted forming: the plug carries material into the walls, and vacuum applies within a short window after the plug reaches depth. Treat pre-blow height and vacuum delay as settings you tune per mold, not fixed values.
Thermoforming's sheet-based approach restricts parts to relatively uniform wall thickness, with any internal features requiring secondary bonding operations that increase assembly time and introduce potential failure points. RIM operates with liquid materials that flow into every detail of the mold, enabling complex internal features and variable wall thicknesses ranging from 0.125" to 1.125" within the same part. — Exothermic
That constraint is why parameter tuning matters so much. You cannot add material to one wall after forming, so you manage thickness distribution upstream.
Gauge and Material-Specific Guidance
Back-solve the starting gauge. Gobelovac gives the working relation: draw ratio equals mold surface area divided by sheet footprint, and starting gauge equals draw ratio times desired finished wall. CW Thomas advises the same approach — start from the required final wall at the deepest draw, then factor expected thinning by geometry and process. Validate with a prototype before you commit to a plastic sheet order.
Design factors shift that estimate. GPI Plastics lists the main ones.
Parameter / Material Factor | Effect on Wall Thickness Distribution | Specific Values / Guidance |
|---|---|---|
Draw ratio | Predicts overall stretch demand and starting sheet thickness | Surface area of formed part divided by footprint area of original heated sheet |
Plug-assist / staged forming | Balances material spread in high-stretch regions | — |
Draft angles | Reduces friction for clean release; matters more as depth rises | Female molds: 1.5 to 3° per side; male molds: 3 to 7°, with 4 to 6° recommended |
Radii and corner design | Sharp corners cause localized gauge reduction | Inside radii at or above sheet thickness; two to three times polymer thickness in deeper draws |
Material selection | Polymer characteristics determine how the heated sheet stretches | Thermoplastics respond differently during forming |
Calibrate sheet temperature to the polymer, not to a generic oven chart. Each grade softens and stretches on its own curve, so a setting that works for one resin can overheat another and invite webbing and thinning.
Xinhejiu's PC/ABS sheet offers high melt fluidity with balanced rigidity. That combination suits complex thin-walled parts, because the melt flows into deep sections instead of stalling and thinning at the base. Good flow supports wall thickness uniformity across the part, and it eases the processing difficulties that slow down tight-draw molds. Pair that material behavior with disciplined thickness control, and you reduce thickness variation without changing the tool.
Measure Wall Thinning and Webbing
Thickness Gauging Methods
You cannot fix what you do not measure. Start with an ultrasonic gauge to get quick readings on finished parts without damaging them. Use a mechanical gauge or micrometer on cut sections when you need a reference value. Shanghai MSD advises measuring wall thickness at the base, sidewalls, corners, and any area that stretches a lot.
Cut a sample part and map readings across those key zones. Build a thickness map for each cavity position, then compare it against your target. This thickness map shows exactly where wall thinning and webbing and thinning begin. A good thickness map also shows whether the problem sits in one cavity or follows the sheet across the tool.
Setting a Quality Control Routine
Define a target wall thickness and a minimum wall for every part. Set sample frequency by product risk, customer requirements, process capability, and the cost of dimensional variation, per Mengxing. Check enough parts to see normal variation, and record the material lot and forming conditions, as Shanghai MSD recommends.
Aspect | Guidance |
|---|---|
Key inspection points | Dimensions, wall thickness, sealing or fit, surface appearance, trimming accuracy, warpage, cracks, pinholes, contamination, and stacking orientation |
Inspection frequency | Should reflect product risk, customer requirements, process capability, and the consequences of dimensional variation |
Keep solid records. Cloudflex advises logging photographs, roll and cavity position, machine settings, time, operator, and product lot. If a defect always appears in one cavity, check the tooling and heater zones. If it follows the roll across cavities, check gauge profile, winding, resin balance, or roll damage. Verify each gauge before use, not after inspection, and track which gauges are fit for use and due for calibration.
Freeze the successful grade and process window, keep samples, and require notice before any material change. A plastic sheet with a high melt flow rate holds wall thickness uniformity better during stretch, so thickness variation stays small and your thickness map stays stable. That consistency supports reliable thickness control across thermoformed plastic sheets, and it keeps webbing and thinning, thickness distribution, wall thickness distribution, and wall-thickness distribution within spec.
Fix heating zones first. Balance the oven profile and stop drafts before you touch anything else. Next, add plug assist and open up corner radii. Then tune pre-blow height and vacuum timing. Material and gauge selection come last, because a high melt flow grade keeps walls even during stretch. Xinhejiu's PC/ABS sheet flows well into deep sections, and its ASA/ABS sheet forms at 220–260°C.
Routine measurement closes the loop. Map wall thickness on sample parts, log the readings, and compare them against your target. That record catches drift early and stops the same defect from returning.
Start with the oven. Most wall problems begin there.
FAQ
Why does my part thin out most at the corners?
Corners concentrate stretch. Material arrives there last, so it pulls thin while the rest of the wall holds gauge. Open up the corner radii and add vacuum holes in deep corners. A plug assist also carries material into those zones before vacuum starts.
How much does a plug assist actually improve wall uniformity?
A lot. Deep-draw parts formed without plug assist show corner thinning of 50 to 70% versus average wall. A well-tuned plug cuts that variation to 15 to 25%. Set the plug to stop at 60 to 75% of mold depth for the best result.
Can a high melt flow grade reduce wall thinning?
Yes. A plastic sheet with a high melt flow rate spreads stretch more evenly across the mold. Xinhejiu's PC/ABS sheet offers high melt fluidity with balanced rigidity, which suits complex thin-walled parts. Its ASA/ABS sheet forms at 220–260°C for weather-exposed parts.
How do I pick the right starting gauge?
Back-solve from your target. Divide the final part surface area by the sheet footprint to get the draw ratio. Multiply that ratio by your desired finished wall. A 4 mm sheet at a 2.0 ratio averages about 2 mm, so plan for that loss upfront.
What sheet temperature should I target?
Calibrate to the polymer, not a generic chart. Each grade softens on its own curve. Run deep-cavity heater zones 5 to 15 degrees Celsius hotter and keep flange zones cooler. Log sheet temperature from extrusion to the forming station so drift shows up early.